RRD material is the best MX specific decal
product out. Made with our easy to install Air Escape material to
help with bubble free decals. As with all parts racing related
parts there is NO WARRANTY. With
that said please read and watch all the stuff below before you
install. Graphics go out quick it does not mean that
are fully cured. It takes up to 40 days before they are really
cured. However if we took 40 days to send graphics our you
guys would freak out. So the longer you wait to put them on
the better. Lastly clean you plastic good, not like you wash
your hands. First wipe plastic down with acetone, let
dry, flame plastic quickly with propane torch, let cool, then
re-wipe with acetone. Stick once try not to peel and re-stick.
Got it!!

1) Line up the bolt hole and the back corner.
2) Squeegee the red line starting from the middle and working out both ends.
3) Work your way down and split any wrinkles in half going out the ends.
4) Work your way to the bottom, go slow work bubbles out.
5) Go back to middle start working upward, again work wrinkles out the ends.
6) Work and remaining wrinkles and bubbles out the top.
7) Chrome
material has a lower bond and plastic prep is critical.
8) Flo
prints have limited life treat with 303 Protectant. You can
find it at AutoZone.
Make
sure your hands are clean. Remove mold release agents off your
plastic before installing. Acetone
works
best.
Brand new
plastic is smooth but will have oily film from mold release from the
factory. For super bonding
effect
wave a propane torch lightly over the plastic. Just a quick pass,
you should see the mold release evaporate off.
then
clean again with acetone. Careful not to discolor the plastic.
21mil----warm graphic and plastic with hair dryer
before
installing.
For wet
application (not recommended) we
suggest mixing a bottle of water with one drop of dish
soap.
Lightly spray plastic and squeegee fluid out following the above
technique. Sit in sun (inside a car window
makes for
a good solar oven) or heat lightly with hair dryer, avoid over
heating. Avoid using for 48 hours You
may trim edges with a razor blade.
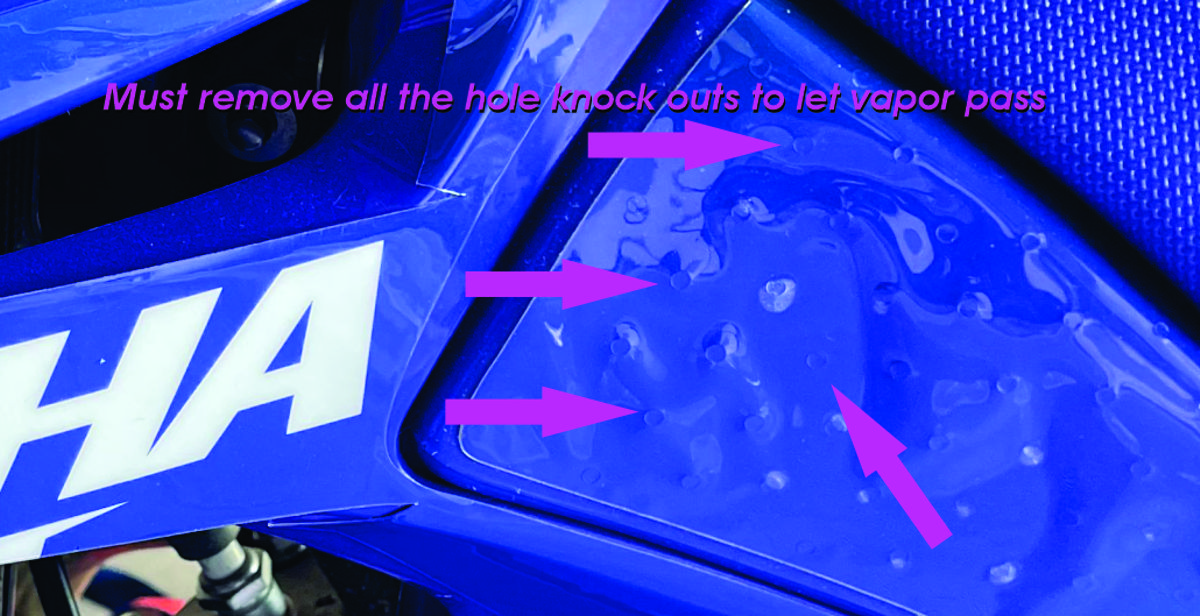
Gas tanks: (Make sure you remove all the little hole plugs before installing). Empty and clean gas tank of all gasoline
may trim edges with a razor blade.
Gas tanks: (Make sure you remove all the little hole plugs before installing). Empty and clean gas tank of all gasoline
and let
sit for 3-10 days with gas cap off. Install graphic (do not apply
wet). Once installed let graphic sit for a minimum of 48 hours
before putting gas in
tank.
Air bubbles will occur after use push air out of the holes to lay
flat. Lastly do
not store your bike with gas in the tank and unscrew the tank
cap.
this applies to: PW50 YZ85 YZ125/250 RM85
RM125/250 and other older bikes that have exposed tanks. After
market and desert tank are generally thinner then stock stack so
expect and even sorter life decals on those tanks.
Do not leave bike in sun.
(Gas will dissolve the glue over a period of time
we do not guarantee the decal on
gas tanks what so ever. Race gas will dissolve the glue even
faster. (so order extra tank sets)
Reprints are available for the gas
tank pieces at:

This is a classic video of a mechanic having to deal with a dude videoing him. We had this happen to us more
then once, "trying to be nice but I got to get stuff done":)
Remember be patient!!!!!!!!!!!
Trailer Graphic Instructions
1 Patients is the key to success!!!!!!!!!!!!!!!!!!!!
2 Find a big table and layout all the pieces. Each piece is numbered
(if done in cut vinyl) by the order it should be put on.
3 This graphic is big so the best way to put this on is wet. Have a sprayer
bottle (NO Windex or window cleaners) with 2 drops of dish soap to 16oz of
water and a squeegee (small 6inch window one will do.)
4 Figure out the area on the trailer you want to do and clean really good and
remove any screws which could be in the graphic area.
5 Mask a straight line and make sure it level. This will give you a good reference.
Don't try and eyeball it.
6 Lightly mist the area you will be applying then peel and wet back fo decal with
fluid lightly. Apply by starting in one corner and squeeze the air bubbles out as you go.
The wet back will help this. Then move on to piece #2 and so on. If this graphic is
done in pieces, seams are made to over lap by about a 1/4 inch.
7 Once you have all the decals go away for a few hours and let dry. Let vehicle
sit in the sun the any air bubbles will out gas. Some will remain you can pop those
with an Exacto knife. Also over time most bubbles perk out.
NO WARRANTY


